






Eclipse Dirigible is a High-Productivity Application Platform as a Service (hpaPaaS). It provides an application server consisting of pre-selected execution engines and built-in web development tools. It is suitable for rapid development of business applications by also leveraging the Low Code / No Code techniques.

Enjoy Programming Like Never Before
From the end user's perspective (developer), Dirigible runs directly in the browser, therefore does not require any downloads or installations.
From the service provider's perspective (PaaS/SaaS), Dirigible packs all required components in a self-contained software bundle that can be deployed on a VM or Docker capable environment such as Kubernetes.
Dirigible supports access to RDBMS via JDBC. Currently supported versions for RDBMS are PostgreSQL, HANA, Sybase ASE, MySQL, H2, and Derby.
Dirigible promotes the In-System Programming development model, where you make dynamic alteration of the live system. To provide the self-contained bundle serving all the needed features for a business application, Dirigible packs various engines such as ActiveMQ, Quartz, Lucene, Flowable, Mylyn, GraalJS and others.
The project started as an internal SAP initiative to address the extension and adoption use-cases related to SOA and Enterprise Services.
You can try the sandbox instance to have a quick look on the functionality you are interested https://trial.dirigible.io.
Join the Eclipse Dirigible Slack Workspace to chat with the community: https://slack.dirigible.io
The "fast-track" - you can download the precompiled binaries produced by the GitHub Actions from http://download.dirigible.io/ and skip the build section.
Nevertheless, we highly recommend building the binaries from source in order to have all experimental features that are not available in the releases.
- Git
- Java JDK 11+
- Maven 3.5.x
- esbuild -
npm i -g esbuild - tsc -
npm i -g typescript
In case there is an issue with 'Filename too long in Git for Windows' then add the fllowing git confoguration
git config --system core.longpaths true
-
Go to the root folder.
-
Build the project with:
mvn clean installIf you are using Windows, make sure that you open the terminal as Administrator otherwise the tests will fail
-
Quick build with tests:
mvn -T 1C clean install -D maven.javadoc.skip=true -D license.skip=true -
If you don't want to trigger license updates:
mvn clean install -D license.skip=true -
If you have a multi-core system, enable threads:
mvn -T 1C clean install -
If you don't need to run tests, you can add the following argument:
mvn clean install -D skipTests -
If you don't need to compile and run tests:
mvn clean install -D maven.test.skip=true -D skipTests -
If you want to do a fast build, with no tests, javadocs and license updates:
mvn -T 1C clean install -D maven.test.skip=true -D skipTests -D maven.javadoc.skip=true -D license.skip=true
The build should pass successfully.
The produced dirigible-application-XXX-executable.jar file is in build/application/target/ and is ready to be deployed. It is Spring Boot application, so it can be executed locally right away.
macOS:
brew install ttyd
Linux:
Linux support is built-in
More info about ttyd can be found at: ttyd
-
From the project root directory run command:
java -jar build/application/target/dirigible-application-*-executable.jarfor Windows
java -jar build/application/target/$((Get-ChildItem dirigible-application-*-executable.jar -recurse -File | Sort-Object LastWriteTime | Select -Last 1).BaseName).jar -
In case you want to debug the application run:
java -agentlib:jdwp=transport=dt_socket,server=y,suspend=n,address=8000 -jar build/application/target/dirigible-application-*-executable.jar -
Open a web browser and go to: http://localhost:8080
-
Login with user:
adminand passwordadmin -
REST API description in an OpenAPI format can be found at: http://localhost:8080/swagger-ui/index.html
- Get the container
-
Pull the official image from Docker Hub:
docker pull dirigiblelabs/dirigible:latest -
Build it locally
  cd build/application
  docker build -t dirigiblelabs/dirigible:latest -f Dockerfile .
prerequisite: build the project as described in step 4 here
-
Start the container
docker run --name dirigible --rm -p 8080:8080 -p 8081:8081 dirigiblelabs/dirigible:latest -
Open a web browser and go to: http://localhost:8080
-
Optionally you can enhance and customize the Dockerfile from here
-
Install PostgreSQL e.g. for MacOS:
brew install postgresqlAlternatively you can use docker image
docker run -itd -e POSTGRES_DB=postgres -e POSTGRES_USER=postgres -e POSTGRES_PASSWORD=postgres -p 5432:5432 --name postgresql postgres -
The run it:
brew services start postgresql -
Create a default user:
createuser -s postgres -
And expose the following environment variables:
 export DIRIGIBLE_DATASOURCE_DEFAULT_DRIVER=org.postgresql.Driver
 export DIRIGIBLE_DATASOURCE_DEFAULT_URL=jdbc:postgresql://localhost:5432/postgres
 export DIRIGIBLE_DATASOURCE_DEFAULT_USERNAME=postgres
 export DIRIGIBLE_DATASOURCE_DEFAULT_PASSWORD=postgres
for Windows execute the following in the terminal with admin privileges
[System.Environment]::SetEnvironmentVariable('DIRIGIBLE_DATASOURCE_DEFAULT_DRIVER','org.postgresql.Driver', 'Machine') [System.Environment]::SetEnvironmentVariable('DIRIGIBLE_DATASOURCE_DEFAULT_URL','jdbc:postgresql://localhost:5432/postgres', 'Machine') [System.Environment]::SetEnvironmentVariable('DIRIGIBLE_DATASOURCE_DEFAULT_USERNAME','postgres', 'Machine') [System.Environment]::SetEnvironmentVariable('DIRIGIBLE_DATASOURCE_DEFAULT_PASSWORD','postgres', 'Machine') -
Then you can run Dirigible with PostgreSQL default database (DefaultDB).
If you have started the Dirigible before, make sure to execute
mvn cleanbefore starting the Dirigible with the PostgreSQL
In order to contribute to the project, you need to configure your java code formatter. Please follow the steps bellow
-
Window -> Preferences -> Java -> Code Style -> Formatter -> Import -> Select this formatter

-
Window -> Preferences -> Java -> Editor -> Save Actions -> Check
Perform the selected actions on save-> CheckFormat source code-> Select ->Format all lines
-
File (or IntelliJ IDEA if on MacOS) -> Settings -> Editor -> Code Style -> Java -> Scheme -> Import Scheme (from the settings button) -> Eclipse XML Profile -> Select this formatter -> Copy to Project (from the settings button)

-
File -> Settings -> Tools -> Actions on Save -> Check
Reformat code
- Install the extension Language Support for Java(TM) by Red Hat
- File -> Preferences -> Settings -> java.format.settings.url: Set URL (or local file path) pointing to Eclipse Formatter Profile file.
To format the code using Maven execute the following in the root dir of the project
mvn formatter:format
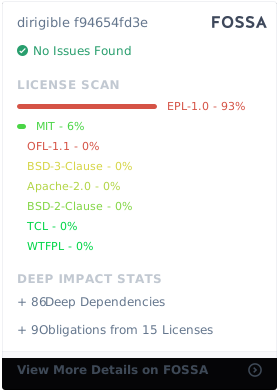
This project is copyrighted by SAP SE or an SAP affiliate company and Eclipse Dirigible contributors and is available under the Eclipse Public License v 2.0. See LICENSE.txt and NOTICE.txt for further details.
If you like to contribute to Dirigible, please read the Contributor's guide.
Unicons by IconScout: https://github.com/Iconscout/unicons
- Project Home: https://www.dirigible.io
- Help Portal: https://help.dirigible.io
- Samples: https://samples.dirigible.io
- Trial Instance: https://trial.dirigible.io
- Slack: https://slack.dirigible.io
- Mailing List: https://dev.eclipse.org/mailman/listinfo/dirigible-dev
- Issues: https://github.com/eclipse/dirigible/issues
- Eclipse Foundation Help Desk: https://gitlab.eclipse.org/eclipsefdn/helpdesk