Extrude Tool plugin for Glyphs.app (Glyphs 4)
Download ExtrudeTool via the Glyphs Plugin Manager. (Window > Plugin Manager)
- Clone or download this repository
- (Unzip if necessary) and open the file with the
.glyphsToolextension. - Follow the "are you sure you want to install" dialogs
- Restart Glyphs
To work on the plugin locally, symlink the bundle into Glyphs 4’s Plugins folder and restart Glyphs:
ln -sf "$(pwd)/ExtrudeTool.glyphsTool" \
  "$HOME/Library/Application Support/Glyphs 4/Plugins/ExtrudeTool.glyphsTool"
After editing ExtrudeTool.glyphsTool/Contents/Resources/plugin.py, restart Glyphs (or reload plugins) to pick up changes.
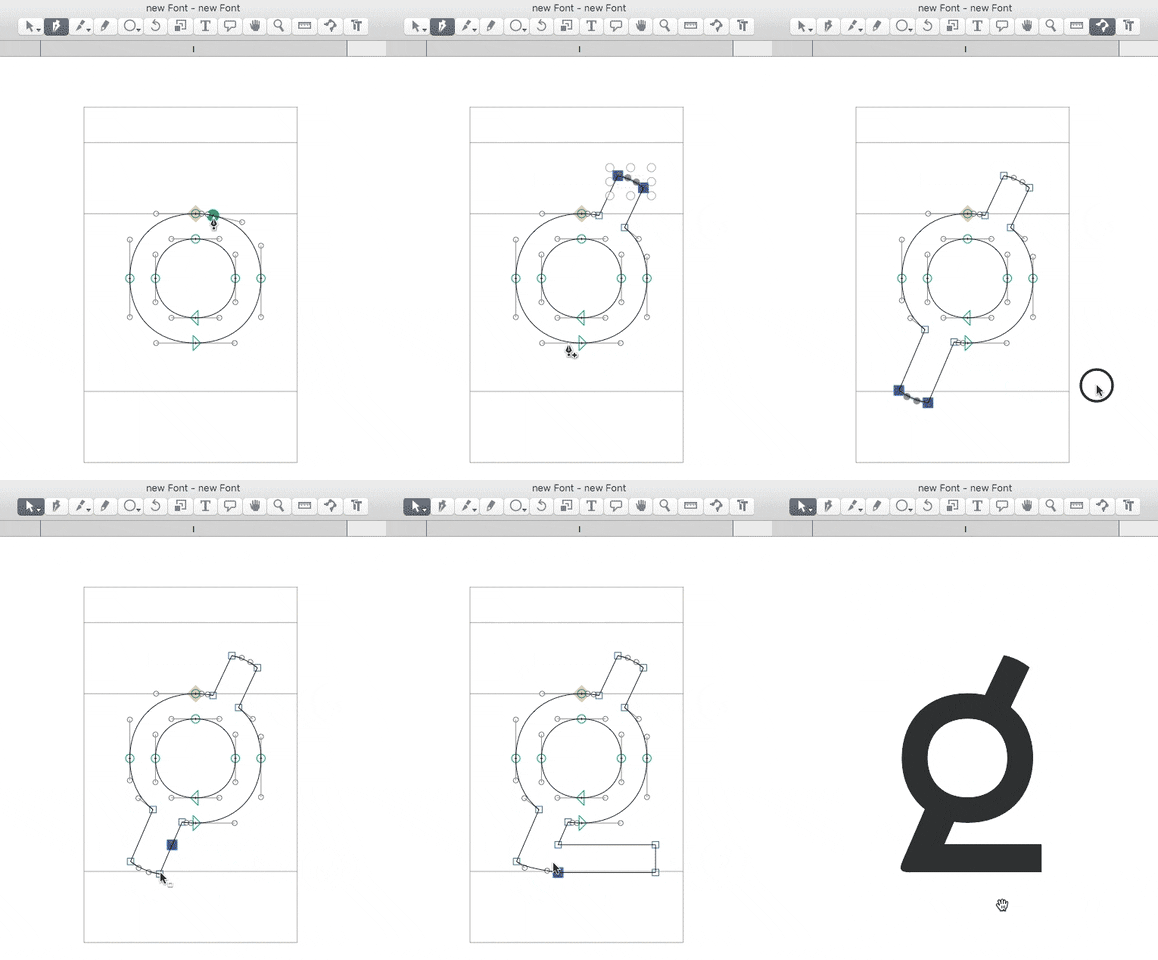
Activate the Extrude tool in the toolbar (w on the keyboard). Select connected nodes by clicking elsewhere in the glyph, then click on a selected node or on a segment of the selected path and drag along the extrusion axis to extrude inward or outward. The extrusion axis is perpendicular to the line connecting the first and last nodes in the selection.
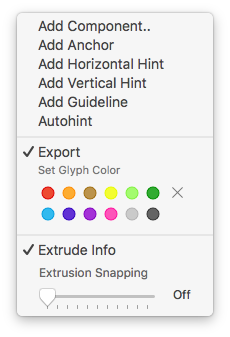
By default, the tool will show an overlay with the distance extruded and the angle of the extrusion. If this interferes with your work, you can turn it off by right-clicking when the Extrude tool is selected, and toggle "Extrude Info" at the bottom of the contextual menu. This setting is saved between sessions.
| With info | Without info |
|---|---|
 |
 |
Alongside the Extrude Info menu item, there is an input that helps snap the distance to a more round number. This is particularly helpful if you want to extrude a distance of some multiple of, say, 8 or 10 units. By default, this is 0 (disabled). This setting is saved between sessions.
To see what's in the pipeline, check out the current issues in projects.